As I am trying to get my XPages development workflow more in line with other development teams, my next step was to implement bower so I can skip dragging, copying, removing, updating (too many verbs already) in order to manage my projects.
First stop was Frank van der Linden’s post on bower4xpages. Most of the commands are described in his post so I skip to repeat them here..
Step 1 – Install Node.js
You can install bower with the Node package manager. So step 1 was to install Node.
Step 2 – Install Bower
With the node package manager I installed bower.
Web sites are made of lots of things — frameworks, libraries, assets, and utilities. Bower manages all these things for you.
Step 3 – Setup the bower files
When Bower runs it needs 2 files: bower.json and .bowerrc file. In the json file you list the dependencies and the rc file points to the location where the files will be copied to. Here is a tip how to create a nameless file in notepad.
Having placed these files in the root of my repository location I was ready for the next step.
Step 4 – Install Git
Since I have been using SourceTree as Git client for Windows I needed to install Git client because Bower makes use of it.
Post Step 4 – Set Windows Environment Variables
When trying to run bower I got message that Git was not installed. Here is a description how to set your Windows environment variables.
Step 5 – Run bower run
Now with everything installed and set the last thing to do was to open the Command Prompt and cd to the root directory of my repository and run the ‘bower install’ command.
As a result I got all the dependencies in my project downloaded and installed.
Once again achieved “a new(er) way of working”.

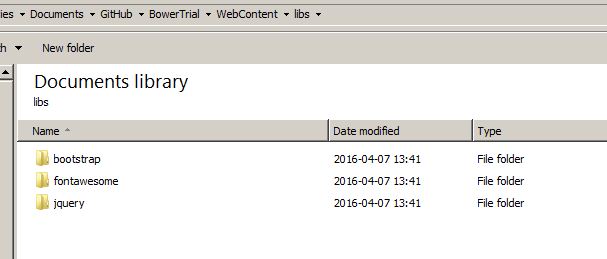
A tip is to point in the bowerrc file to a libs directory in the WebContent directory in your On Disk Project. (for example nsf/WebContent/libs) where nsf is the directory for my ODP.
That way you have immediately all your frameworks in the right spot. THe only thing inside the DDE, goto Navigator view, find the ODP –> refresh and sync the database with ODP and voila
Hi Frank thanks for the tip. I found this tip also useful:
Assuming that in File Explorer you have opened the target directory/folder, do this:
Click on address bar, alternatively press Alt+D
Now when address bar is highlighted, type cmd in the bar.
Press Enter key
You will notice that command prompt from that folder